Dr. Zamir Punja and Cannacopia!

Friday, March 11, 2022

Disease Identification and Management - Key Concepts for Cannabis Success

We are beyond pleased to announce that Dr. Zamir Punja, of Simon Fraser University, will be joining us on March 17th for Perennia's first ever cannabis workshop! He will be chatting with us about identifying the biggest disease-causing agents in cannabis, and providing suggestions for managing them as well! Following his talk, viewers will have the opportunity to chat with Dr. Punja and ask any questions you may have. 

For those of you who aren't familiar with his name, Dr. Zamir Punja is a Professor of Plant Pathology and Biotechnology at Simon Fraser University with expertise in plant pathogens, tissue culture and molecular biology. Before joining Simon Fraser University, Zamir was the was manager of plant biotechnology for Campbell Soup Company where he worked on carrot diseases. Since then, his research has included work with greenhouse vegetables, ginseng, blueberry, and wasabi. Recently his lab has been developing methods for identifying and managing new and emerging diseases of cannabis. Zamir’s work with cannabis has produced many scientific publications and established him as one of the leading cannabis disease researchers in North America.

You will be able to catch Dr. Punja's session at 3:20 AST on March 17th. For more information on our cannabis workshop, or details regarding registration, click here


Workshop Alert - Cannacopia is Coming to A Screen Near You!

Wednesday, March 9, 2022

Introducing...Cannacopia! Perennia's First Ever Webinar Focused on all Things Cannabis!

 Join us for an afternoon of speakers focusing on Key Concepts for Cannabis Success. 

We have enlisted a team of experts to discuss facility sanitation, disease identification and management strategies, as well as hear first hand from about what it takes to start up a successful edible brand.  In addition, the Cannabis scientists at Perennia will be sharing information on most frequently asked questions when it comes to microbial contamination, as well as highlight the scope of services we offer - some even free of charge! Each session will be followed by a question period to help elaborate on anything you want to learn more about. The workshop will finish off with a panel discussion amongst our industry experts, with the opportunity for feedback from the audience as well. 

This free of charge workshop will take place on March 17th from 1-5 pm AST. For more information, or those looking to register, click here


The Importance of Water Activity and Cannabis

Monday, March 7, 2022

 How Water Activity Prevents Microbial Growth

There are specific measures for what we call water activity; another way of saying water activity is internal relative humidity. All those little air pockets inside of the cannabis flower will have a certain relative humidity, which is going to be the same as the water activity in the cannabis plant material itself. There are certain levels of water activity where microbes can grow, for example, the bacteria that we’re worried about grow above the 0.85 water activity level. There are yeasts and moulds that grow in the area between 0.65 and 0.85 water activity, where 0.65 is the accepted limit for mould growth in cannabis. 

Most of your moulds are not going to grow below 0.70 water activity, but some can grow down to 0.65 and there are a few others that can grow down to 0.60 water activity, but those are much less common and not really a concern in cannabis. Values below 0.65 water activity is considered the safe limit for cannabis flower. There are specific levels for water activity below which microbes cannot grow. It doesn’t matter how much water is in the cannabis or in any given product, but it’s a specific level of water activity that determines whether or not microbes can grow. 

Water Activity and Government Compliance

Because this issue with microbial growth is based on water activity, there are specific government compliance parameters for a variety of different products that need to be kept shelf stable. Cannabis is one of those, and there are standards set up in order to help people maintain compliance. One of the standards for cannabis is the ASTM D8196 for determining water activity in cannabis flower.

The Water Activity Sweet Spot for Cannabis

That space between 0.55 and 0.62 water activity tends to be the sweet spot where those moisture levels are just right. Anything above 0.65 you’re going to have potential for microbial growth, so, we really want to be below 0.65. A little bit lower than 0.65 is always helpful because you want to make sure that you’re not going to have issues, give yourself a little bit of leeway, but you also don’t want to be too dry.

If you get too low in water activity level, it causes oxidation of the trichomes, and you have a reaction that leads to loss of terpenes and cannabinoids. If you’re too high in water activity, then the challenge is that you’re going to have fungus growth, yeast growth, or other microbe growth, so maintaining that water activity is really important. 

Water Activity: Fast and Accurate to ±0.003

Something to look at when you’re looking at water activity is that water activity is temperature dependent; as a general rule, higher temperatures lead to higher water activity. For any given product, the change in water activity based on temperature is going to be consistent for specific products. Also, in cannabis, you’ll see that higher temperatures lead to increased rates of decarboxylation. That means we want to maintain a level of water activity or relative humidity in your cannabis flower, even when it ships for distribution and sale. So, if your product does experience higher temperatures, you may see higher water activities that may put you over the acceptable water activity limit, where you might see some microbial growth. 

Being able to protect that humidity level when product leaves your facility and before it’s consumed is important, and you’ll want to be aware and give yourself a little bit of extra leeway. Being closer to the 0.60 or 0.62 water activity level is probably better than being right at 0.65 water activity in case there are temperature fluctuations that the product experiences after it’s packaged.

If you’re looking at 60% relative humidity, that’s the same as saying 0.60 water activity. Relative humidity is expressed in a percent. Water activity doesn’t really have a unit, but we call it water activity or aw. So, it’s the water activity that determines whether or not mold fungus or microbes can grow, and its water activity that determines quality, meaning chemical and physical reaction rates. 

At BloomLabs, we can get an accurate measurement to ± 0.003 aw and a precision of 0.002 aw, which is a very, very specific measurement! You can contact us at bloomlabs.ca to receive more information about our cannabis testing! 

To sum up, we want to dry the product to the right water activity level to hit the sweet spot so that we’re not over drying, causing quality loss and less sales profit, but also, we don’t want to under dry to enable mould and microbial growth!


Posted By: Jay Radadiya

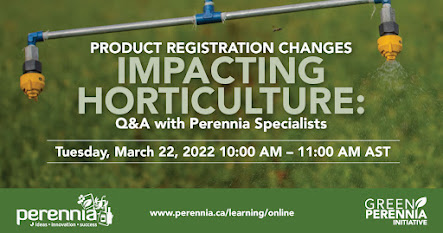
Product Registration Changes Impacting Horticulture

Monday, February 28, 2022

 Q&A with Perennia Specialists

Perennia's commodity specialists are coming together to talk about product registration changes that will be coming into effect for 2022. This is a great opportunity to catch up on all things product related, and ask your specialist any questions you may have when it comes to label changes, use patterns and new/discontinued products. 

The focal crops during the session are apples, wild blueberries, cranberries, vegetables, berries, cannabis, and field crops. Each specialist will bring information on products that are relevant to their sector. In this conversational style webinar, we’ll answer frequently asked questions and live questions that you submit.

 For more information on the webinar, and session registration, click here

Selecting Soilless Substrate

Friday, February 18, 2022


Soilless substrates are used across the world, offering a solution to those with difficult soils to grow on, or those who are looking to increase efficiencies when it comes to nutrient and water inputs. These substrates are comprised of non-soil components, but still provide the structural support needed by the plant in order to grow.

When it comes to the base material used for soilless grow media, there are two groups: synthetic and non-synthetic products. 

How do I chose what substrate to use?

While both synthetic and non-synthetic substrates are good options for providing structural support, nutrients and water to the plant root system through the cropping cycle, there are a few key questions to consider when purchasing a growing media:

1) What is the cost? 

Substrates are not created equally when it comes to cost. It is not recommended, however to chose the cheapest/most expensive one without understanding what you are getting with it. It is definitely an important factor to consider, but make sure that you understand the rest of the list below when making your choice. 

2) Where is the material coming from?

In COVID times, shipping delays are all too real for producers of all shapes and sizes. This should definitely be a consideration if you have yet to order your growing media for the upcoming season. There are many local substrate providers who might be able to fill your needs without having to ship overseas. 

3) What is the baseline nutritional status of the media?

While soilless substrates do not have much to offer in terms of baseline nutrients, it is important to realize that there are differences between the base materials. Some substrates are going to be more prone to having high initial salt levels compared to others, and if the media is not treated properly, these salts can be very damaging to your new crop. Be sure to ask your provider about your substrate and the treatments it has received. 

4) What is the particle density, porosity and particle size range of my substrate? 

These are key parameters that are going to determine how well or how poorly your substrate holds on to water. A substrate with tiny particles, means that the air and water spaces within your media are also going to be very small. This makes it harder for the plant to pull water out of those air spaces. It is also difficult for this water to drain out of the media, meaning the roots are more prone to sit in a wet matrix, regardless of the time of day. This has a tendency to lead to root disease and sub-optimal plant productivity. On the other end of that spectrum, large particles have very little capacity to hold onto water, meaning you are significantly increasing the number of irrigation events throughout the day to sustain plant growth. 


5) How do I want to handle my substrate?

Substrate is available for purchase in a few different forms. It can be purchased in large bulk orders, where the producer must hydrate, divide up into the individual growing containers, and then move those containers into the growing space. The other option is to purchase pre-filled slabs (also referred to as grow bags). Some crops have the option for specialized containers that help mitigate some production issues that typically develop down the line, while others don't. It is up to the producer, the target crop, and the labour force available, to decide which method is going to work best for that particular operation. 

6) What am I going to do with my substrate now that I'm finished with it?

This is where things get a little hairy. Synthetic substrates cannot be composted, and usually require transport off site for disposal. Non-synthetic substrates do have the option for composting, but must be done in a strategic way to prevent the accidental creation of an oasis for lingering insects and disease. This
plays in to point number 5 as well - removing the inner contents of a slab wrapped in plastic is much more time consuming to compost compared to a crop grown in a container.  
 

_________________________________________________________________________
For those who are new to growing in substrate, these questions can be overwhelming...but never fear! Your Protected Crop Specialist is here. If you have any questions on soilless substrates check out some of Perennia's resources:

Aseptic Sampling Technique

Friday, February 4, 2022

What is aseptic sampling?

Aseptic sampling refers to certain principles that must be followed during product sampling to avoid contamination or the introduction of a microorganism, or other contaminant, not originally present in the product by one’s actions.

Aseptic sampling is about managing the risk of contamination of the sample itself, as well as the process or container.

Why should I practice aseptic sampling?

Collection of samples while not practicing aseptic technique can lead to contamination of the sample – leading to inaccurate results, failed quality assessments and potential costs associated with re-testing product.

For example: A bacteria called Staphylococcus aureus is a common member of the body’s microbiota and is frequently found on the surface of the skin and in the upper respiratory tract. If aseptic technique is not used, such as proper operator hand washing/sanitation and protective equipment while collecting samples (including gloves), a cross-contamination of this microorganism can occur between the operator taking the sample and the product. This could lead to a detection of Staphylococcus aureus in the sample during quality analysis, leading to a failed quality assurance test. This could result in a re-test of that product and delays in releasing the product to market.

How do I practice aseptic sampling?

One of the most important rules when collecting aseptic samples is to avoid contaminating the sample. This requires the sample collectors to collect all samples with caution to make sure this rule is not violated. The results of aseptic sample analysis are questionable, and of no use, unless the integrity of the sample can be assured from collection to shipment, and through analysis. We will discuss below some basic methods to reduce the risk of sample contamination.

For quality control and traceability, when taking a sample be sure to record information such as:

  • Who took the sample?
  • Where and when was it collected?
  • How was it taken?
  • What training did the sampler receive?

This can assist in the investigation of any possible cross-contamination issues.

Personal equipment, such as lab coats, hair nets or disposable or cleanable boots, are important to ensure that the collector does not contaminate the sample. Additional essential items for aseptic sampling include:

  •           Sterile containers – Ensure that your product is placed into a sterile container or bag, such as Whirl-Pak bags or Falcon tubes. The sampling container must not be opened and exposed to the environment prior to immediate collection of samples to avoid contamination.
  •         Clean gloves - If a product must be touched during sample collection, have one of the facility workers who are involved with handling the product place the sample into the collection container with gloved hands. Because employees are normally involved in handling the product during production, we would not consider that they have added additional contamination to the product. When gloves are used, they must be put on in a manner that does not contaminate the glove. Gloves must be of the right size to function properly.
  •       Sampling tools - Spoons, scoops, specific types of triers, forceps, tongs, dippers, and cups.  The type of tool used is determined by the product to be sampled; however, to reduce the risk of sample contamination it is recommended to use a new sterile sampling tool for each sample.

In addition, be sure to check the sterilization date on all sampling equipment and containers. The date should be on the label or package of the equipment. Some equipment might be sterilized in one’s local laboratory or purchased sterile. Equipment sterilized in a local laboratory is normally sterile for at least two months. After that time, the equipment should be re-sterilized.

Finally, after collection, ensure that the sample is packaged in a secure way to reduce the risk of damage or contamination of the sample while it is being transported to the lab for analysis.

At BloomLabs, we take thorough care to ensure that the samples we receive are always tested “as received”. Meticulous aseptic techniques and Standard Operating Procedures are used in the Microbiology Laboratory to ensure that no cross-contamination occurs during analysis. For example, this includes use of a Biological Safety Cabinet, proper sanitation of personnel and surfaces, and sterile sampling equipment and PPE to ensure that no contamination of the sample occurs during analysis. This ensures an accurate quality result, free of any contamination from the laboratory.


The use of aseptic technique at the production facility, during transportation and at the laboratory ensures your product receives the highest quality of analysis free of any contamination.

Webinar - Maximizing Spray Coverage and Product Efficacy

Wednesday, January 19, 2022

Most pesticide application information is NOT geared towards protected crops, which is why maximizing your spray coverage and product efficacy is even more important for effectively combatting your pest and disease issues. 

Join Jason Deveau ('The Spray Guy') , Louis Damm (Dramm Corporation), Michael Brownbridge (Bioworks) and Colin Ashbee (Bioworks) on January 20 at 9 am EST for a series of presentations which focus on cannabis as the model crop. They will be discussing spray equipment catered to cannabis production, teachings on how to analyze your spray coverage, and best spray practices for using Bioworks' products. 


For those who are interested in participating, click on the following link - no registration is required here, so jump on the link tomorrow morning and follow the prompts above the 'agenda'. 

Hope to see you there!

Posted by: Talia Plaskett


Regulatory Requirements for Testing Cannabis - What Do I Need to Know?

Friday, January 7, 2022

 You’ve grown some beautiful cannabis and now Health Canada requires you to test it to sell it in the market – here’s what you should know.

Analytical testing of cannabis is a regulatory requirement under the Health Canada Cannabis Act and Regulations but what does that mean?  How do you know what to test for?  How do you determine if your test results are acceptable, and your cannabis passes the test?  Great questions!


Under “Good Production Practices”, Part 5 of the Cannabis Regulations, sections 89 to 92 outline what testing is required to meet regulatory requirements:

  •                Testing for phytocannabinoids; and
  •          Testing for contaminants.

 So, essentially that means you need to test your cannabis for cannabinoid content and ensure it is free of pesky microbial and chemical contaminants.


Testing for phytocannabinoids, or cannabinoids, is to determine the cannabinoid content of your cannabis – the THC and CBD you hear so much about.  This includes a breakdown of the total cannabinoid content into individual cannabinoids (cannabinoid profiling) and how much of each cannabinoid is present (cannabinoid potency).


Testing for contaminants is broken down into microbial-type contaminants and chemical-type contaminants. 

  1. Microbial testing determines the presence or absence of microbials such as E. coli and Salmonella spp. and the colony-forming units (cfu) of Total Combined Yeast and Moulds, Bile-tolerant Gram-negative Bacteria, and Total Aerobic Microbial Count.
  2. Chemical contaminant testing determines the presence or absence and potency of potentially harmful heavy metals, such as Arsenic, Cadmium, Lead, and Mercury.  As well as the presence or absence and potency of harmful mycotoxins, such as Aflatoxins B1, G1, B2 and G2.  Other chemical contaminants include testing for residues of pest control products (also known as pesticides) meaning it is also necessary to determine whether pesticide active ingredients are present or absent, and if present, the concentration of the pesticide active ingredient.


Seems so simple, right?  Unfortunately not all things are as easy as they seem. “Cannabis Product”, Part 6 of the Cannabis Regulations, section 93 outlines how to determine if your results are passable:


  • Microbial and chemical contaminant limits are acceptable so long as it meets limits accepted by one of the authorized publications outlining these limits as referred to in Schedule B of the Food and Drug Act.  This list of publications includes the European Pharmacopeia and the US Pharmacopeia, for example.  The task of choosing an acceptable publication to follow for limits can be a bit daunting, as you also must keep in mind the intended use (for example, inhalation) for your cannabis product.
  • When it comes to pesticides, Health Canada has established their own limits for residues as identified and described under the Pest Control Products Act.  A comprehensive list of 96 pesticides and the limit for each can be found in the Health Canada guidance document “Mandatory Cannabis Testing for Pesticide Active Ingredients”.  The Cannabis Regulations also states that the more stringent limit applies to generally accepted tolerance limits in relation to residues of pest control products.  Which further breakdown to any pesticide result that exceeds an acceptable residue limit must be reported to Health Canada.


While testing your cannabis may seem very complex, it is a necessary chore to ensure regulatory requirements are met. Our experts at BloomLabs are well versed in the necessary regulatory testing, as well as the interpretation of the test results, so don't hesitate to reach out and inquire about all that we have to offer!

Posted by: Michelle Shearer

PREVIOUS Bloom to Bud Posts